Redrawing old diagrams using Flash
Introduction
In this article I will describe how to redraw (or 'trace old diagrams by hand') using MacroMedia/Adobe Flash. It will hopefully teach Flash newbies how to use the main tools and understand the basics of what can make it a useful tool for other purposes not just creating god-awful animated ads on websites ;)
I am a coder, why should I care?
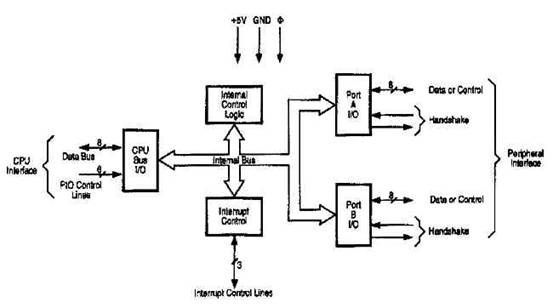
Many coders will have already skipped this article because they think Flash is only for graphics-people, not true. In fact in this article I will re-create a simple diagram from a very old and very badly scanned Z80-PIO document. The advantages of using Flash (once you have overcome the 'strange new interface') is that the finished item will be in vector format so any rescaling/changes can be done while still being able to print at a very high quality.
Dig under the surface of Flash and you will find some elegant ways of building highly complex diagrams quickly in very little space. Of course a dedicated CAD/vector package will have more features but how many of those packages allow web-based distribution of static/animated images in a 'almost standard' compressed container like .swf files?
In the past I've re-created many diagrams simply to make life easier and found having a small, compressed .swf file makes it an ideal way to use on a website since 99% of people have a version of the Flash plug-in in their web browser. What makes it worthwhile is being able to right-click and zoom into the compressed vector diagram (not to mention being able to add interaction through buttons and JavaScript-like action-scripting) as well as being able to print a clear copy whenever you want.
Preparing the image
Firstly we need to clean up the image, crop it to a suitable size and (most important of all) convert it into a transparent .gif or .png image. Basically use your favourite image editor (Photoshop, Fireworks, Paintshop Pro, or even old MicroGrafx Picture Publisher (my personal fav)) and magic-wand + remove the main background colour to a transparent one. This will allow the background grid within Flash to show through making the process of drawing much easier.
Loading the image
Launch Flash and close most of those panels that we don't need. The panels/windows you will need are Transform, Properties and Color Mixer.
Load the .gif or .png image using the File -> Import menu option. You should have the image on Layer 1. If the image is bigger than the work stage (the main drawing canvas area) then simple click on the image to select and look at the properties to determine the width and height, click on the background to deselect it and you should be able to change the canvas properties of the Document – if not use the Modify -> Document menu option.
Now let's set the background grid to make things easier to work with with View -> Grid -> Edit Grid and try using units of 8 pixels for the grid size such as 16x16, 24x24, 32x32 and so on. Show the grid and enable Snap. Tweak either the size of the grid or resize the image until most of the diagrams lines up neatly on the grid – this will be speed up drawing later on.
Learning to love layers
Together with the library symbols, layers are the most useful part of any graphics based package. In this example we'll use a separate layer just for the background image and lock it into place – this prevents us moving the image by mistake.
Double-click on the 'Layer 1' label on the right side of the main timeline grid and enter a new name (e.g. 'Background') and click the little pad-lock symbol to prevent the layer being modified and/or moved.
Where to begin?
We can break the diagram down into small parts through the use of Groups, Layers and Symbols. I tend to use lots of symbols because once created they can be dragged from the library and reused again and again. I use Layers to divide the image up into overlays such as text, boxes, connections and action-scripting (if needed).
Looking at the diagram below we can see its made up from horizontal, vertical and 45-degree lines of different width lines with some text and arrows.

I tend to construct the hardest parts first then add the text and arrows later on. By doing this you can scale up your background image to 125% to 500% to better match the underlying snap grid if you need to. Remember we're using creating vectors so the result will not get chunky like a bitmap. Increasing the precision makes drawing quicker.
Let's begin with the large white connection arrows.
Using a grid setting of 8px by 8px gives us a close match to the arrow size.
TIP: If you unlock the background layer, select the image on the work area/canvas and hit F8 (or Insert -> Convert to Symbol) to convert the image into a *Movie-Clip*. You can then modify the alpha, brightness and other settings of it to make it semi-transparent on the canvas which allows the background grid to show through. Select the Movie-Clip Instance on the canvas and on the properties panel change the Color dropdown menu to Alpha and try 33% to 50%. Your original image is now a light grey color with the grid clearly visible. Remember to re-lock the layer to prevent changes afterwards!
Check your current layer!
Make sure you have locked your background layer and added a new layer (rename it 'arrows' or whatever you want) and make sure it is selected. This is a common problem when you begin drawing everything on the wrong layer. The problem/advantage with Flash it that any vector draw over each other on the same layer will be combined into line segments or sub-polygons.
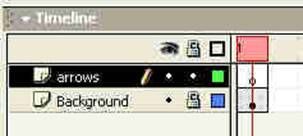
On the 'arrows' layer we can begin drawing the arrow shape using the Line tool. Don't worry about not being perfect just use the grid-snap to draw a symmetrical arrow like the one below.
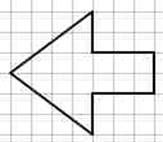
You may be tempted to draw the entire middle section with all those 5 arrowheads from a single line but lets do it another way, the 'CnP' method (Cut 'n' Paste way ;) Because we want the same arrowhead repeated 5 times let turn our outline above into another symbol.
First fill the inside of your arrow shape with white so the grid disappears like the picture below. Remember to select the 'arrows' layer and make sure there are no gaps in your arrow shape.
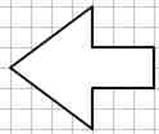
Select everything on the 'arrows' Layer and hit F8 and convert into a Graphics symbol. The main reason for filling with white is to make it much easier to drag and place items on the main canvas area.
On the canvas (or 'stage' as Macromedia liked to call it) you should notice that your shape has a blue outline box around it – this indicates that it is a symbol. By Double-clicking you can open the symbol and edit it (notice how the rest of the canvas goes dull-white). Click on the 'Scene 1' link at bottom of the Timeline to return back to the canvas.
Select, Copy and Paste your arrow shape symbol (the blue outline box should appear when you select it). Now you have 2 copies of your symbol. Open the Transform panel and Rotate 90 degrees.
Drag the rotated symbol into the correct place. Notice in Flash you get different drag anchors depending on where in the symbol you begin to drag from. For example, drag from the centre you get the centre anchor. Drag from the top middle to get the top middle anchor and so on...
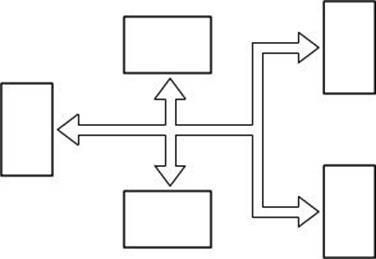
Once you have the 5 arrows in place its time to draw the connecting outline boxes between them.
Choose the Box/Rectangle tool with Black outline stroke and White fill colors.
Draw rectangles using the same snap grid lines and don't worry about extra black stroke lines they can easily be removed later – in fact this is the best way to draw in Flash, draw all the basic shape using primitives then combine them together by removing the shared edges.
Select the unwanted lines between the rectangles and hit delete. Flash will automatically merge neighbouring polygon regions.
NOTE: I've hidden the grid and reduced the zoom to 50% in order to make the images smaller.
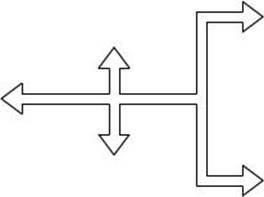
To remove the 'base' line inside each arrow graphic you need to double-click to edit, select the line and hit delete. Click back to the 'Scene 1' on the timeline, add some rectangles and you should have the following.
Small black arrows
Now the basic structure is done, let's begin with the small black arrow shapes.
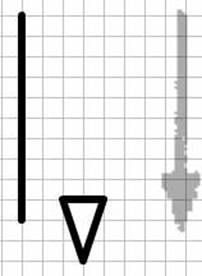
As you can see from the grid the arrowhead is 2 squares (16px) by 3 squares (24px). Draw a vertical line roughly the same height as the original light-grey arrow on the right side.
Select the entire arrowhead (click and drag a selection box to select all 3 lines + inside filled triangle shape) now click and drag the very bottom of the triangle to get a mid bottom anchor and use this to merge the two arrow parts like this:-
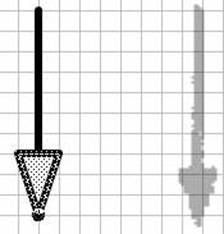
Change the Fill color to black, select the entire arrow, hit F8 and convert into another Graphics symbol. Now you can reuse that black arrow again and again using the CnP method ;)
TIP: If you edit the black arrow by double-clicking you can change the 'origin' point of the symbol by selecting and dragging it up using the mid bottom anchor point until it snaps to the small origin x shape. This helps when using tricky shaped symbols because you have a useful origin point – in this case it's the point of the arrow.
On the diagram there are also some bi-directional black arrows. These can be created from scratch, or by duplicating the symbol in the Library and editing it. I'll let you experiment with one/both ways to create the following symbol:

Once you've done the arrow, you have pretty much learnt all the basic techniques of Flash. Add the other Instances (copies) of the arrow symbols and the large 45-degree based brackets and you should have something like this:
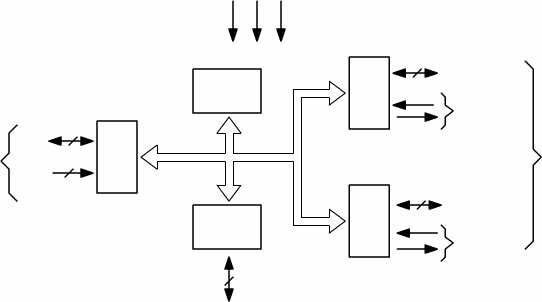
Adding the text
There is only the matter of adding the text to the diagram and its almost done! So create another new layer called 'text' and hide the 'arrows' Layer. This will make adding the text in the right place much easier, also later you can just select everything on the text layer to change a font and/or color J.
By adding some text over the original background image we can work out the font is close to Arial 22pt. make sure on the properties panel you 'Center' the text using the icon. Now copy and paste or just type the text for the rest of the diagram.
Finishing off
Once everything is done you can delete the original background Layer and Publish the compressed .swf file (and example html page if you wish).
File -> Publish Settings and enable the .swf (and optionally .html) file formats. Use the top tabs to configure the .swf and hit the Publish button.
You can now sit back and enjoy your tiny, compressed vector file and be sure any printouts you do will look good.
Good luck and have fun!